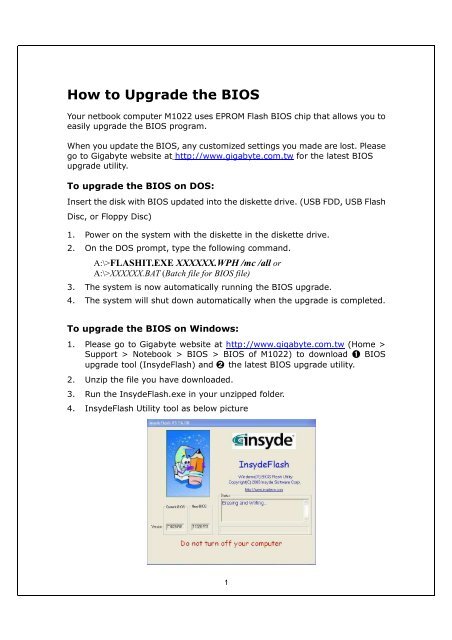
Insydeflash Windows Bios Flash Utility
Please download and install the Acer Upgrade Assistant. There are three major phases: Phase 1: Before the upgrade (Windows 7) Download BIOS. Insyde Software is leading worldwide provider of UEFI firmware systems management (BMC firmware) solutions. The most widely used UEFI BIOS in production.
• ) Obtain the correct BIOS file for your system. The file extension will usually be one of the following: “.fd” “.rom” “.bin” “.wph” 2.) Please see to determine what you should rename the BIOS file to. 3.) Copy the renamed BIOS file to an EMPTY USB flashdrive. If the flashdrive is not empty or is incorrectly formatted, the recovery process may fail. 4.) Disconnect the AC power adapter and, in the case of a laptop, remove the battery as well.
5.) Insert the USB flashdrive into one of the USB ports on the computer. In most cases, the particular USB port that you use will not matter. That being said, some computers are finicky and will only accept a specific USB port for recovery. 6.) With all power sources disconnected from the computer, hold down the ‘Windows’ key and the ‘B’ key. Do not release these keys until instructed to do so. 7.) Connect the AC power adapter to the computer. 8.) Press the ‘Power’ button on the computer.
9.) When the LED’s illuminate, you may release the two keys from step #6. You may notice some of the LED’s illuminating differently from how they do in normal computer operation. 10.) After about 10 seconds, the computer should start reading the flashdrive. While searching for the file system, the computer may (should) beep for one second. The number of beeps can vary based on the capacity of the flashdrive as well as the number of files on it. If the BIOS file is not found, the computer will reboot and try again. 11.) If the file is found, the computer will load it.
The particular computer used in this tutorial took 12 seconds to load the BIOS file, but times can vary based on the size of the BIOS image. No beeps will be heard during this process.
12.) After the computer is finished loading the BIOS file, it will start flashing the BIOS. During this process, the computer will beep every 2 seconds. The computer used in this tutorial took about 32 seconds. About 5 seconds after the flashing process has finished, the computer will shutdown. If the recovery process was successful, then the BIOS should work normally the next time you boot up the computer.
*NOTE: Not all devices will produce beeping sounds during the recovery process. The USB flashdrive LED should still blink on and off while the computer is loading the BIOS image.
If the loading process is successful, the computer should shutdown within the next minute. Albino 3 vst rapidshare downloads free. For larger BIOS images, this may take longer. Hi I’ve been trying to recover my Acer Aspire 5742 due to a corrupt bios, and been following the pages for phoenix instructions (5742g uses it apparently) but stopped when I realized that mine uses Insyde. I have confirmed this by entering crisis mode to see if it would work. The newest bios for my model is 1.30, which has a KBCA230A.rom file, and a pew71x64.fd file.